Corvette Caliper Rebuild
Article by Mark Trotta
Rebuilding brake calipers is more time-consuming than difficult. A good solid work bench, a few hand tools, and basic mechanical ability are all that's needed.
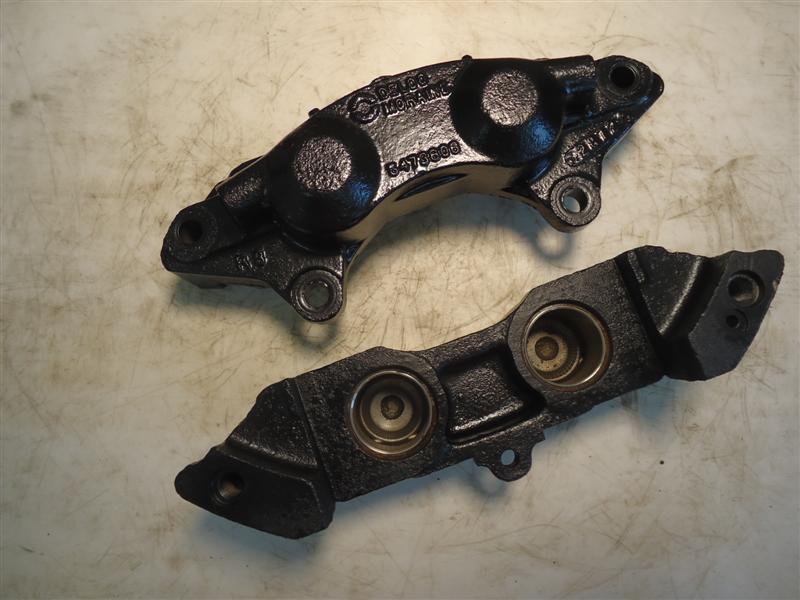
This article covers caliper removal, disassembly, cleaning, and inspection. For caliper reassembly click here.
***********************
Getting Started
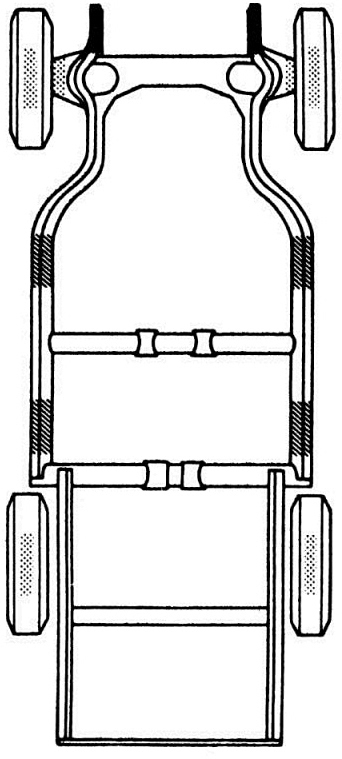
Begin by loosening the wheel nuts before lifting the car. Carefully support the car on four jack stands. If you haven't lifted your Corvette before, use the four lift points in the illustration below.
After removing the wheels but before removing anything, spray the caliper bolts, bleeder screws, and brake lines with WD-40 or similar penetrating fluid. The longer it soaks, the better it works. For stubborn parts, soaking overnight is best.
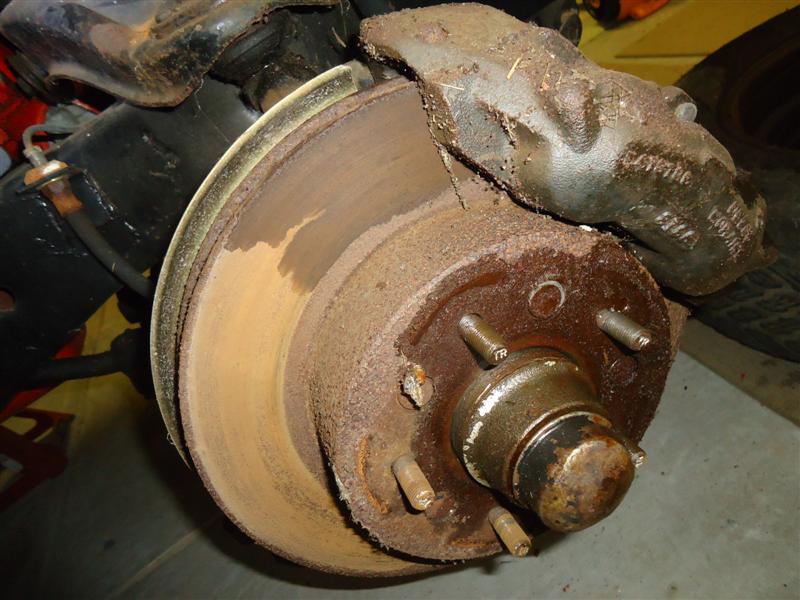
Loosen the two mounting bolts on each brake caliper just enough to get a socket on the heads of the caliper housing bolts (the bolts that hold the caliper halves together). These two bolts are torqued to 130 lb-ft, so before you remove the caliper, it's easier to loosen these bolts while still mounted on the car.
A 13/16" socket with a 1/2" drive breaker bar were needed to remove mine.
It's easier to loosen the bleeder screws while the caliper is still bolted on. Inspect them for any sort of damage. Replace if needed.
Carefully remove the brake line with a flare nut wrench. Make sure your wrench fits snugly over the nut.
Spraying with WD-40 and waiting an hour helps loosen stubborn nuts.
Once off the car and on the workbench (preferably in a work pan), clean the outside of the caliper with brake parts cleaner and a wire brush.
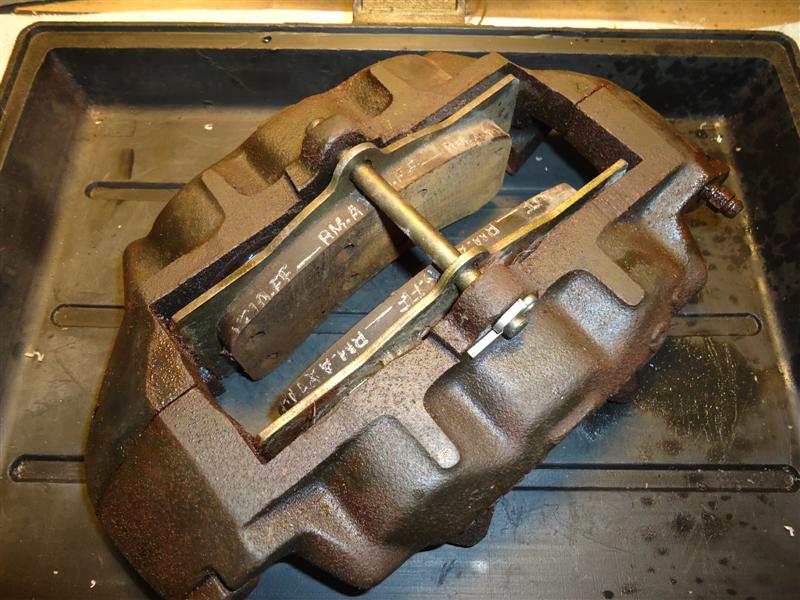
Remove the cotter pin and the brake pad pin. Sometimes the brake pads will slide right up out of the calipers. The ones from my 1966 Corvette were siliconed onto the caliper pistons. A couple of light taps with a hammer and screwdriver freed them.
If the pads look re-useable, mark them "inside" and "outside" so you'll be able to reassemble easier.
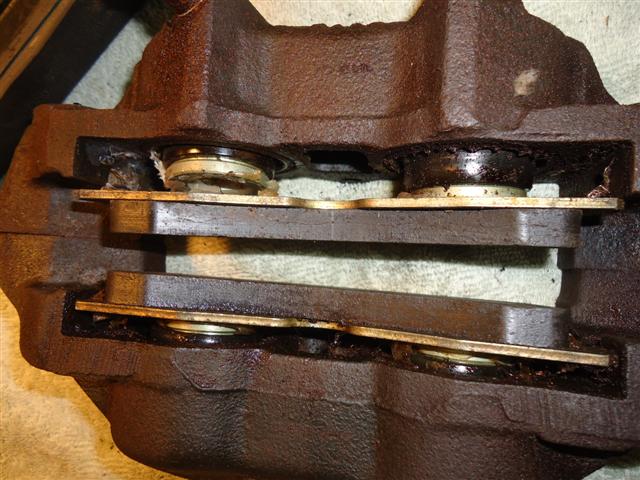
Remove the two caliper bolts and separate the halves. Don't worry about mixing them up - the inside caliper is the one with the bleeder screw. The outside half has the recesses for the small caliper-half O-rings.
Inspect the bolts for damage--rounding off or stripping.
With the pistons still in the bores, continue cleaning. Be careful around the piston assemblies.
***********************
Brake Caliper Disassembly
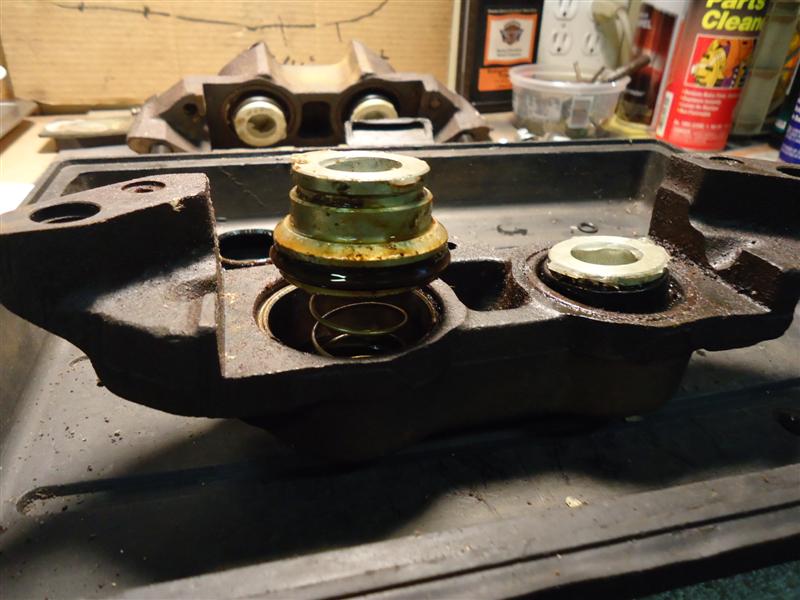
To remove the piston, push the piston into the bore. Then, with a screwdriver (or a picker-outer), pry up on the metal ring that holds the rubber seal around the piston. Each caliper has four pistons. Clean them and put them aside.
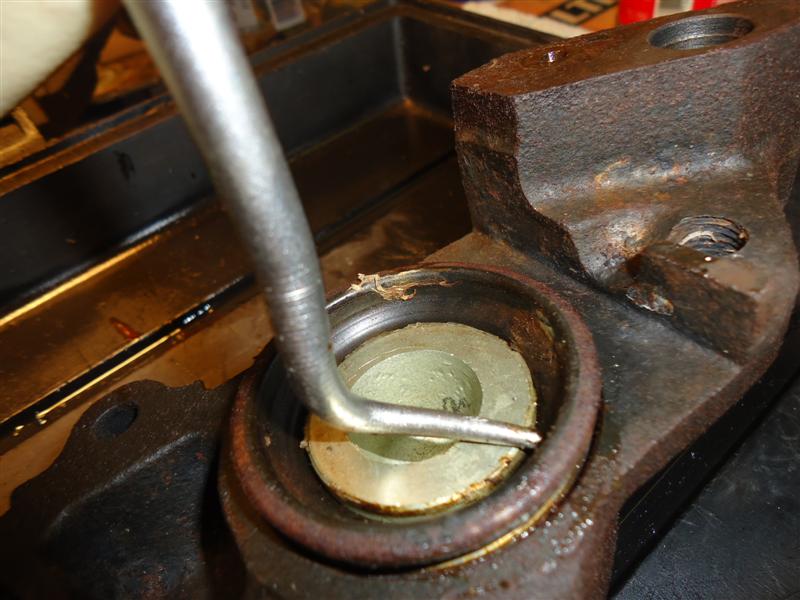
Behind each piston is a light spring. If you are using the original lip-seal type caliper pistons you must re-use them. If you are using O-ring style caliper pistons the spring is optional.
Read: Lip Seal vs O-Ring Calipers
GM used two different size springs for the pistons. There is a small spring and a larger spring. If the larger is used where the smaller should be, increased pressure on the piston will make the pad drag more on the rotor.
Brake Fluid
Conventional brake fluid is hygroscopic, meaning it absorbs water. Over time, moisture builds up and rust develops. This is why GM recommends changing brake fluid every 25,000 miles or 24 months (whichever comes first).
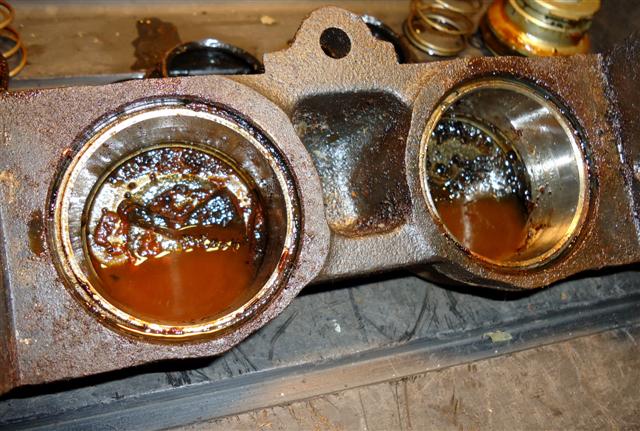
If you're switching to silicone brake fluid, all traces of the old fluid must be removed. You can use soap and water, because glycol fluid is soluble in water. Scrub the caliper well, then rinse with clean water. Blow out all passages, rinse with alcohol and blow everything out again. Dry it quickly to avoid rusting. This should remove all traces of water. As an extra precaution, let the parts sit overnight in a warm, dry place.
***********************
Stainless Steel Sleeved Calipers
Although original C2 and C3 piston bores were cast iron, most Corvette calipers have already been stainless-steel sleeved somewhere in their history. This is easily told by the shiny smooth silver circle inserts that the pistons sit in.
If yours are still the original cast bore, consider having yours stainless-steel sleeved. Most Corvette suppliers offer this service.
Assuming that you have stainless steel sleeves, check that the bore is not scored or corroded. Gently run your finger around the bores. You should not feel anything. If it is lightly scored or scratched, use some fine emery cloth to polish it up. If there are gouges that won't come out, they should not be re-used and will need to be re-sleeved.
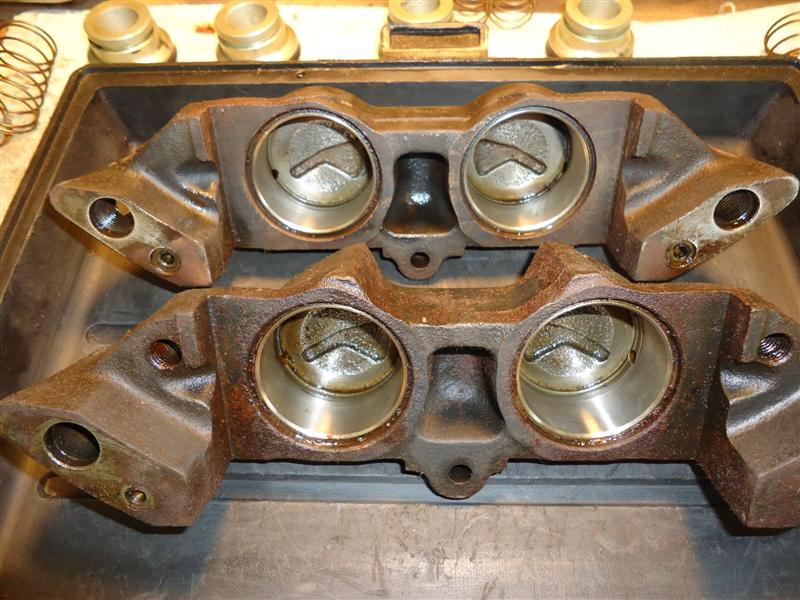
After cleaning the bores with brake cleaner and a soft toothbrush, take a clean, soft cloth soaked with clean brake fluid. Rinse and wipe the bores clean. After re-washing thoroughly, blow passage ways clear with compressed air. Wear safety glasses while you do this.
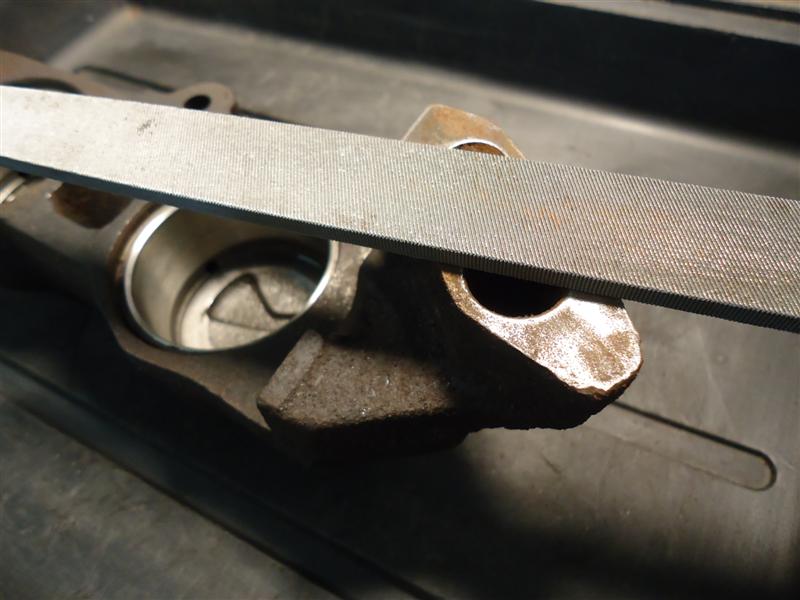
Straightness of caliper mating surfaces can be checked with a file or straight-edge.
***********************
Inspect the Caliper Pistons
One at a time, hold a piston in one hand and rotate it slowly. With your fingers, feel for any scratching or dragging. Small scratches can be sanded out with fine emery cloth. If the pistons have any pitting they'll need to be replaced. I needed to replace several of mine.
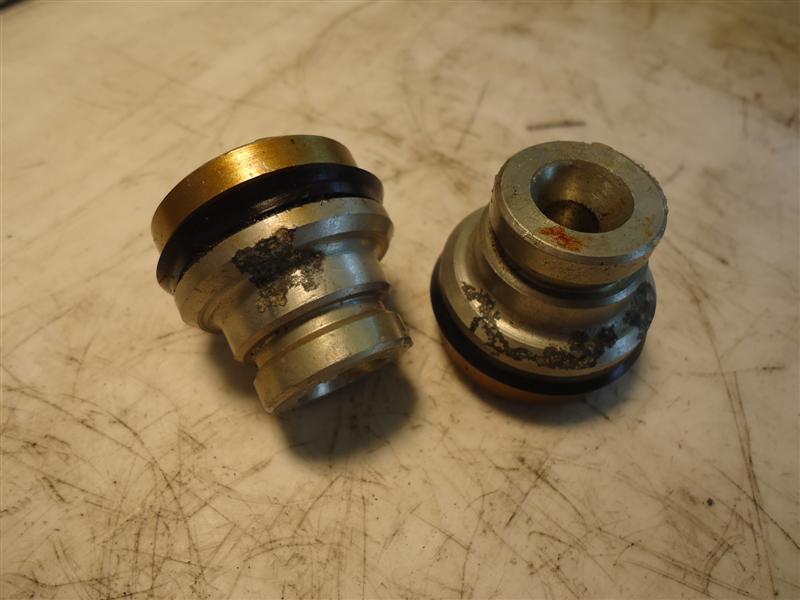
With everything clean, place a seal-less piston into each of the bores and measure the gap with a feeler gauge. There should be .0045" to .010" play. If there's more than .010" play, it will not seal correctly. Consider re-sleeving or replacing the caliper.
***********************
If this work seems a little above your skill level, you can buy fresh rebuilt calipers from a reputable parts supplier such as Ecklers or Summit. You can also buy them from Amazon.
You can still save money by installing them yourself.
***********************
Related Articles: